Archive for Trees

Finished Nursery

Posted in Creative Reuse, Upcycled Forest Nursery with tags , , , , , , , , , , , , , , , , , , , , , , , , , , , , on October 1, 2012 by Lax Cat Creations

The nursery is finished!

Well actually it was finished about 4 1/2 months ago, in time for Ansel’s arrival, but I am just now getting around to write about it. I am so pleased with how it turned out. There is a lot going on but that is how I tend to decorate. I get going and want every part of the room to be special. At least I know visual stimulation is NOT something Ansel will lack!

I also like that many elements in this room are appropriate for when he’s older as well. (Where the Wild Things Are, anyone?) This room also works for a child of either gender. Heck, I would put half of this stuff in my own bedroom.

Click picture to see the panorama full size.

Here I am, so glad to be finished with this room and so ready to have the baby. Four months later I have yet to look that well-rested!

Twisted Juniper Cat Tree – Part 2 – Platforms

Posted in All Things Trees, Tutorials with tags , , , , , , , , , , , , , , , , , , , , , on August 28, 2012 by Lax Cat Creations

Patience. This tree took a lot of patience. In particular, fitting the randomly shaped platforms between and around tree branches.  This portion of the project was the slowest, yet in my opinion, makes the tree really pop.
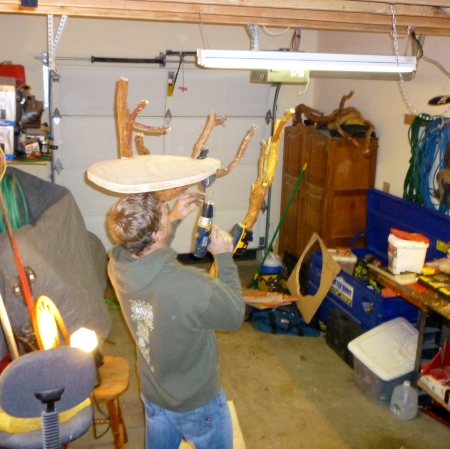
Using the shape of the tree, we determined where the platforms would be, what size and shape they were to become, and how we envisioned the cats getting to each one. Saki is a spry and wiry guy, but Pixie…not so much. She could be called small, but portly. To date, most of the smaller in-between levels are unused by Saki, but Pixie will carefully pick her way to the top most every time she uses the tree.

Using a 2′ level, string line, tape measure, sharpie, and an eye for straight lines, we started in. A laser level would be a good idea too. The first points to be defined and cut were the bigger branches.  Smaller limbs can be manipulated more easily than the anchor branches.

The main tools to make the cuts are a reciprocating saw (“Sawzall”), angle grinder, hand saws of various shapes and sizes, and the good ole fashion hammer and chisel.  I generally start with the sawzall, dig with the chisel, and fine tune with the grinder.

***A word to the wise…wear some protective gear. I am no model of wisdom…***

In order to ensure the best fit and location, cut and fit the platforms one at a time. We would cut the shape we wanted, then modify as the tree demanded. To get tight and snug connections, whittling away at both branch and platform is mandatory.

We cut our platforms out of plywood scraps from one of my job sites. Scraps of this size are pretty easy to come by as they are considered useless once they are less than 16″ wide. These platforms are 1 1/8″ thick. If you cannot find thicker plywood, two pieces of 1/2″ laminated and screwed together will work just fine.

Live load testing is recommended.

To make things comfy, we rounded off all the bottom edges with a router and 1/4″ round over bit. Then, an old sleeping bag pad was cut to fit.

After trying to cut, then glue the pad in place, we reverted to cutting the pad a little big, gluing it to the platform, then trimming – much faster.  After applying 3M spray adhesive, the platforms were placed foam down and loaded up with anything heavy to ensure a good bond.

We picked up a couple of yards of fleece from a fabric store and set to wrapping the platforms. Fleece is soft and stretchy, just what was needed to deal with the irregular platform shapes.

The top was covered first, wrapped over the edges and attached it to the bottom using Elmer’s glue and staples. A second piece of fleece was cut just shy of the edge of the platforms and glued over the folds and staples.

This portion of the work was completed after all the platforms had been cut and fit into place. Minor adjustments to the tree were needed due to the extra thickness.

I used a variety of deck screws ranging from 1″ to 6″ in length to attach the platforms to the tree limbs.  My goal was to hide the fasteners as much as possible and to do so, I countersunk the screws as much as I could. Many of them are buried in knot holes and crevices that the tree offered.

A couple were driven through the fleece and platform and into the tree. In these instances, the screws often sliced right through the fleece leaving a small, barely noticeable  hole.

In cases where the holes had to be drilled, some red and black markers, then stain provide a decent camouflage. If you were a real pro, you’d probably use wood filler, but that’s above a beyond what our little life demands.
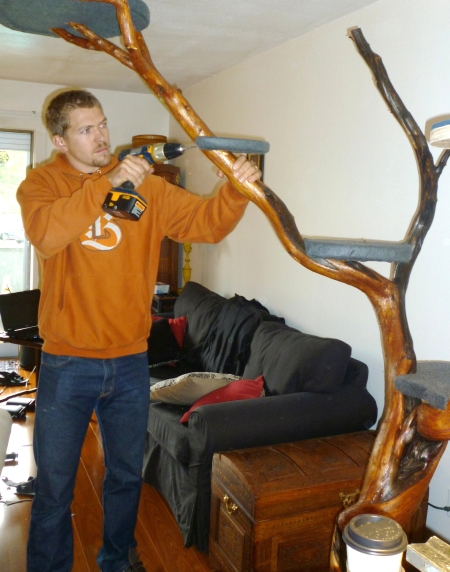
One of our platforms surrounds a branch completely and had to be installed in two pieces. The picture above and below show the fleece wrap of the platform after it has been attached to the tree.

And that is how we assembled the platforms. Comfy, clean, and secure.

The Forest Ranger that pulled us over quizzically eyed the massive juniper in the truck bed, “It’s a little early for Christmas tree cutting in July don’t you think?” Not when you’ve got 6 months of preparations… 


It doubles as a lovely Christmas tree, don’t you think?

Old Door + Fallen Branches = Shelves!

Posted in All Things Trees, Creative Reuse, Tutorials, Upcycled Forest Nursery with tags , , , , , , , , , , , , , , , , , , , , , on April 29, 2012 by Lax Cat Creations

To go with our forest theme, as well as to be consistent with our habit of upcycling materials for our nursery, we decided we needed shelves that made creative use of something old and also had something woodsy. We kicked around several options and I poured through pinterest photos looking for the perfect idea. I saw several shelves held up with rope that I really liked, rustic looking but a bit too beachy. Tom had the idea to use branches as braces.

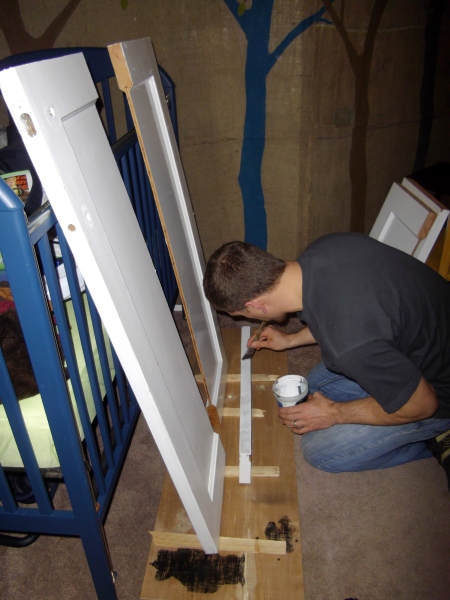
Tom also thought it would be cool to make use of an old door for the shelves instead of buying regular shelving. We found this one at The ReBuilding Center here in Portland.  Old is in many ways synonymous with quality and craftsmanship in the world of construction. This door is solid wood through and through.

Tom cut the door in two pieces.

Safety Tip: Materials painted before 1978 are likely to have lead paint so be sure to read up on it and take the necessary safety precautions!

He then cut each piece of half lengthwise.

We painted the shelves with several coats of polyurethane to seal the paint and provide a wear resistant finish.

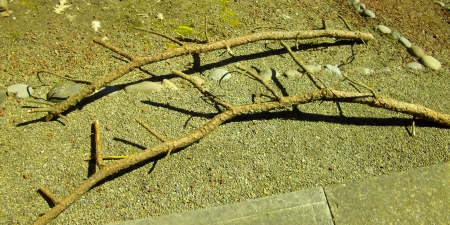
For the supports I found fallen pine branches on my walk home from the bus stop.

Tip: Use a portion of the branch to rub and knock off all the loose bark.  This will save the mess inside and reduce the flaking of the bark after the shelves are in use.

We mounted the backs of the shelves to the wall using long screws anchored into the studs.  The shelves are leveled and temporarily held in place using a piece of lath.

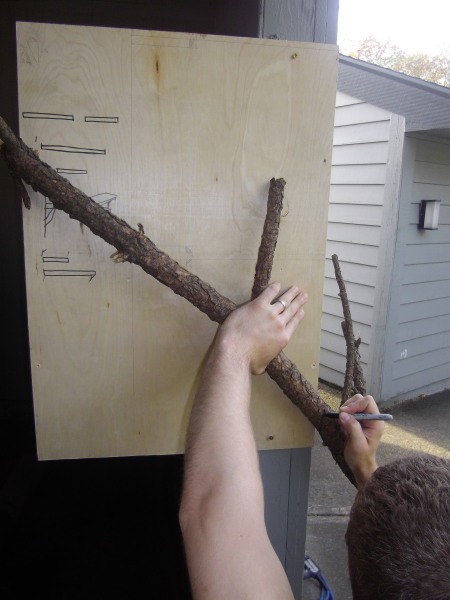
The most challenging part of this project was getting the branches cut. Living in a condo with no work shop makes projects like these challenging, but not impossible.  A piece of ply wood can be used to layout the shelving location and a keen eye and patience can be used to trim and cut the branches until they meet the wall and shelves in just the right way.

The branches with less “character” can be cut much quicker using the plywood as a guide to keep your cuts perpendicular and straight.

If you have access to a proper shop, a set of clamps, and a deep enough saw, these cuts can be made in a very clean manner. For the rest of us, we’ll use the “rustic” excuse.

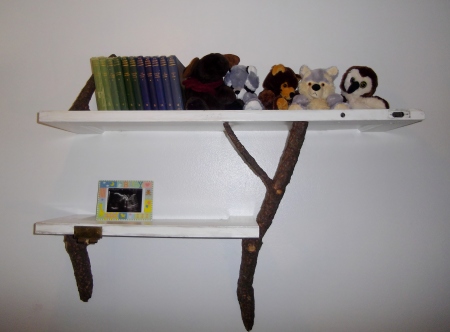
After the cuts are made and the branches all meet the walls and shelves in an acceptable layout, we pre-drilled holes in everything and began screwing it all together.  We used multiple screws for redundancy where the branches were thick enough.  These pine branches were soft enough that the screws could be counter sunk and hidden in the bark.

This branch was the most challenging.  It meets the lower shelf half way up and then connects to the upper shelf in two locations.  We live on the second story and Tom was  up and down the stairs for 30 minutes trimming and adjusting.

After getting everything together, we applied another coat of polyurethane to everything.  Applying the final coat to the branches first allowed any residual bark to flake off onto the dry shelf surface instead of onto a fresh coat of wet polyurethane making for an easy clean up and smooth finish on the shelves.  The polyurethane did a great job and securing the bark to the branches.