DIY Mei Tai Baby Carrier
What can you make with an old pillowcase, two curtains, a tablecloth, and 6 cloth diaper inserts? Well, lots of things probably, but how about a mei tai!
I cannot tell you how excited I am about this baby carrier. In addition to it costing me nothing (I used what was in my linen closet), it was actually very easy to make. I am NOT a seamstress and this was my first real sewing project. Thankfully, I had my dear sister to help. She is less of an amateur than I, and owns a sewing machine to boot!
I started out following the tutorial by SkippyDooDah and ended up changing a few things to meet my needs better. I left the panel rectangular and sewed the the straps at a right angle instead of on a diagonal. This helps keep the straps from sliding off the shoulders. I added a hood and made the straps longer to fit Tom. I also made the waist band thicker for extra support.
Below are the dimensions and materials I used. You definitely want to use strong fabric or reinforce it like I did with the straps if you are at all unsure.
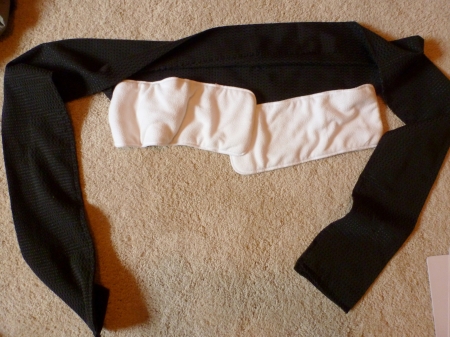
Shoulder straps – Two pieces- 3m x 25cm. I used black curtains and sewed a strip of the green curtain inside for reinforcement. Padding for shoulders – I used 2 Fuzzibunz elite diaper inserts for each strap (4 total). Each insert is 28.5cm x 10.5cm. We sewed 2 together lengthwise so the total length of the padding is 57cm. Waist strap – 2m 8cm x 30cm. I used a very dense tablecloth. Padding for waist – 2 Bumgenius diaper inserts sewn together lengthwise. Each insert is 30.5cm x 13.5cm. Body panel – 45cm x 40cm. I found that the width of a standard size pillowcase is the perfect height. It also means three less edges to sew! Hood – 32cm x 22cm. I used the tablecloth for this as well. I cut off the hem of the tablecloth to make the ties.I cannot stress how important it is to iron all of the folds before you sew. This probably goes without saying for the experienced seamstress but if you are like me and like to wing things, this is for you!

Shoulder straps are sewn folded over the panel. Straps are then sewn shut from the top end leaving an opening for the padding.
After all of the pieces were attached, we sewed several lines lengthwise on all three straps. This keeps everything in place and gives it a finished look.
Since making this I have retired my moby and use this exclusively every day. I think $150 to buy a mei tai would have been money well spent but how cool is it that we made it instead?
Mei tais are extremely versatile and comfortable to wear. They can be worn in front or back for infants through toddlers. After you’ve sewn your mei tai, learn how to wrap it here.
On another but related note, is there anything more lovely than a sleeping baby?
Share this:
Related
This entry was posted on November 9, 2012 at 10:12 am and is filed under Creative Reuse, Tutorials, Upcycled Forest Nursery with tags API, attachment parenting, baby wearing, Eco-friendly, Recycle, Reuse, ring sling, Upcycle. You can follow any responses to this entry through the RSS 2.0 feed. You can leave a response, or trackback from your own site.


November 10, 2012 at 2:30 am
Ansel’s sweet little face says it all 🙂
November 28, 2012 at 12:37 am
great job! great idea! 🙂
July 2, 2013 at 11:39 am
So cute!!